
Workbench利用Python驱动MAPDL执行APDL命令
2017-09-15 by:CAE仿真在线 来源:互联网
Workbench建模所能用的脚本js命令不够丰富,因而使通过js建立比较完善的模型的可能性几乎为0,同时Workbench的Mesh模块采用的也是js脚本,同样不够丰富,无法比较好的自动完成模型的网格划分。
基于以上原因,想要通过js实现模型的参数化创建与网格划分的可能性非常小,难度相当大。然而,ANSYS经典的APDL命令却非常的完备,几乎能够完成任何操作。故,可在Workbench中结合MAPDL模块来完成相关工作,实现整个过程的参数化,提高自动化程度。
该篇文章是前面一篇《Workbench利用Python驱动DM执行Js进行建模》的姊妹篇。主要阐述两个问题,一是如何在workbench中驱动APDL命令,二是如何实现Python脚本与APDL命令的数据传递与交换。
首先,如何在workbench中驱动APDL命令
# encoding: utf-8
# Release 16.0
SetScriptVersion(Version="16.0.361")
#在workbench主界面创建DM模块
template1 = GetTemplate(TemplateName="Geometry")
system1 = template1.CreateSystem()
#在workbench主界面创建MAPDL模块,并与DM模块建立联系
template2 = GetTemplate(TemplateName="Mechanical APDL")
system2 = template2.CreateSystem(
Position="Right",
RelativeTo=system1)
geometryComponent1 = system1.GetComponent(Name="Geometry")
setupComponent1 = system2.GetComponent(Name="Setup")
geometryComponent1.TransferData(TargetComponent=setupComponent1)
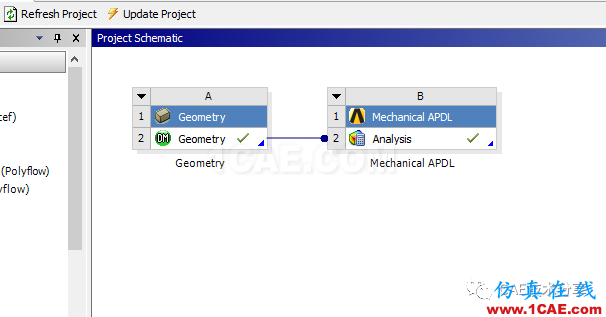
创建的结果如下。
#启动DM模块
system1 = GetSystem(Name="Geom")
geometry1 = system1.GetContainer(ComponentName="Geometry")
geometry1.Edit()
#DM模块执行Jscript脚本命令,创建几何模型
geometry1.SendCommand( Command = """
var ps1 = new Object();
//Plane
ps1.Plane = agb.GetActivePlane();
ps1.Origin = ps1.Plane.GetOrigin();
ps1.XAxis = ps1.Plane.GetXAxis();
ps1.YAxis = ps1.Plane.GetYAxis();
//Sketch
ps1.Sk1 = ps1.Plane.NewSketch();
ps1.Sk1.Name = "Sketch1";
//Edges
with (ps1.Sk1)
{
ps1.Ln7 = Line(0.50000000, 0.00000000, 0.52000000, 0.00000000);
ps1.Ln8 = Line(0.52000000, 0.00000000, 0.52000000, -1.00000000);
ps1.Ln9 = Line(0.52000000, -1.00000000, 0.50000000, -1.00000000);
ps1.Ln10 = Line(0.50000000, 0.00000000, 0.50000000, -1.00000000);
}
//Sketch
ps1.Sk2 = ps1.Plane.NewSketch();
ps1.Sk2.Name = "Sketch2";
//Edges
with (ps1.Sk2)
{
ps1.Ln11 = Line(0.10000000, -0.60000000, 1.00000000, -0.60000000);
ps1.Ln12 = Line(1.00000000, -0.60000000, 1.00000000, -0.62000000);
ps1.Ln13 = Line(1.00000000, -0.62000000, 0.10000000, -0.62000000);
ps1.Ln14 = Line(0.10000000, -0.62000000, 0.10000000, -0.60000000);
ps1.Ln15 = Line(0.00000000, -0.50000000, 1.36996958, -0.50000000);
}
var rev1=agb.Revolve(agc.Add,ps1.Sk1,ps1.YAxis,agc.DirReversed,180.0, 0.0, agc.No, 0.0, 0.0)
agb.Regen();
""")
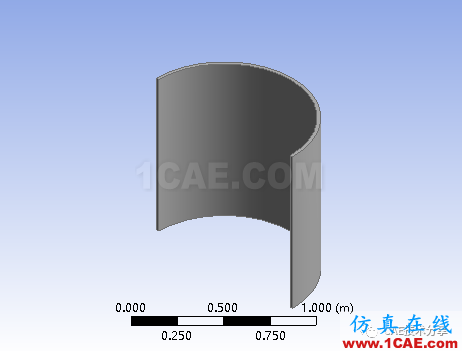
上段py代码通过SendCommand函数驱动DM执行js脚本创建几何模型,此处模型较为简单,如下所示。
##更新APDL模块,打开MADPL
system1 = GetSystem(Name="APDL")
setupComponent1 = system1.GetComponent(Name="Setup")
setupComponent1.Update(AllDependencies=True)
setupComponent1.Refresh()
setup1 = system1.GetContainer(ComponentName="Setup")
setup1.Edit(
Interactive=True,
LoadInputFiles=True)
下面便是关键的部分,通过上面的几句py命令,打开了MAPDL模块。
setup1.SendCommand( Command = """
/prep7
et,1,185
vplot
vsweep,all
eplot
CDOPT,IGES
CDWRITE,ALL,'file','cdb',,'file','iges'
save
! /exit
""")
##关闭APDL窗口
setup1.Exit()
##更新APDL模块
system1 = GetSystem(Name="APDL")
setupComponent1 = system1.GetComponent(Name="Setup")
setupComponent1.Update(AllDependencies=True)
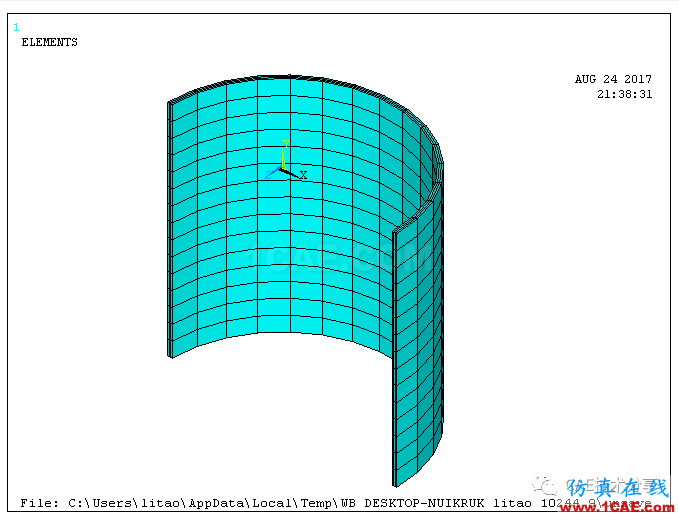
可以看到,同样是通过SendCommand命令,将APDL命令传递给MAPDL模块。几句APDL命令完成的是单元定义、网格划分、结果保存。
/prep7
et,1,185
vplot
vsweep,all
eplot
CDOPT,IGES
CDWRITE,ALL,'file','cdb',,'file','iges'
Save
完成后在MAPDL界面可以看到如下结果。
其次,如何实现Python与APDL的数据传递
实现Python和APDL数据传递的目的是为了更好的实现参数化过程,因为APDL命令在主脚本里全部都是字符串的形式,与Python本身其实是无法直接进行数据传递的。
但是,却可以通过替换字符串的形式来进行数据传递。
同时,与DM模块的js脚本的传递不一样,js脚本是属于面向对象,而APDL命令却是面向过程的,在利用SendCommand的时候,可以逐句完成。
下面是一个例子。
# encoding: utf-8
# Release 16.0
SetScriptVersion(Version="16.0.361")
template1 = GetTemplate(TemplateName="Mechanical APDL")
system1 = template1.CreateSystem()
setupComponent1 = system1.GetComponent(Name="Setup")
setupComponent1.Refresh()
setup1 = system1.GetContainer(ComponentName="Setup")
setup1.Edit(
Interactive=True,
LoadInputFiles=True)
Para_A = 1.0
Para_B = 2.0
Para_C = 3.0
cmd_A="A=%f" % Para_A
cmd_B="B=%f" % Para_B
cmd_C="C=%f" % Para_C
setup1.SendCommand(Command=cmd_A)
setup1.SendCommand(Command=cmd_B)
setup1.SendCommand(Command=cmd_C)
setup1.SendCommand(Command="""
/prep7
block,,A,,B,,C
""")
例子中,有A、B、C三个数据,这三个变量的值在Python里面定义,但是想要传导到MAPDL中,需要间接定义三个APDL语句,cmd_A、cmd_B和cmd_C。
原始的APDL命令应该是:
cmd_A=A
cmd_B=B
cmd_C=C
利用SendCommand传递时,通过cmd_A="A=%f" % Para_A,将参数A的值替换到语句A=1.0中,于是得到一句APDL命令cmd_A=1.0。
注意到上面代码多次用了SendCommand命令。这也是Python能够实现APDL的数据传递的重要原因,得益于APDL的命令能够逐条导入。
姊妹篇:
《Workbench利用Python驱动DM执行Js进行参数化建模》
相关标签搜索:Workbench利用Python驱动MAPDL执行APDL命令 Ansys有限元培训 Ansys workbench培训 ansys视频教程 ansys workbench教程 ansys APDL经典教程 ansys资料下载 ansys技术咨询 ansys基础知识 ansys代做 Fluent、CFX流体分析 HFSS电磁分析 Abaqus培训


